Zigbee Chair Occupancy Sensor
Contents
The problem
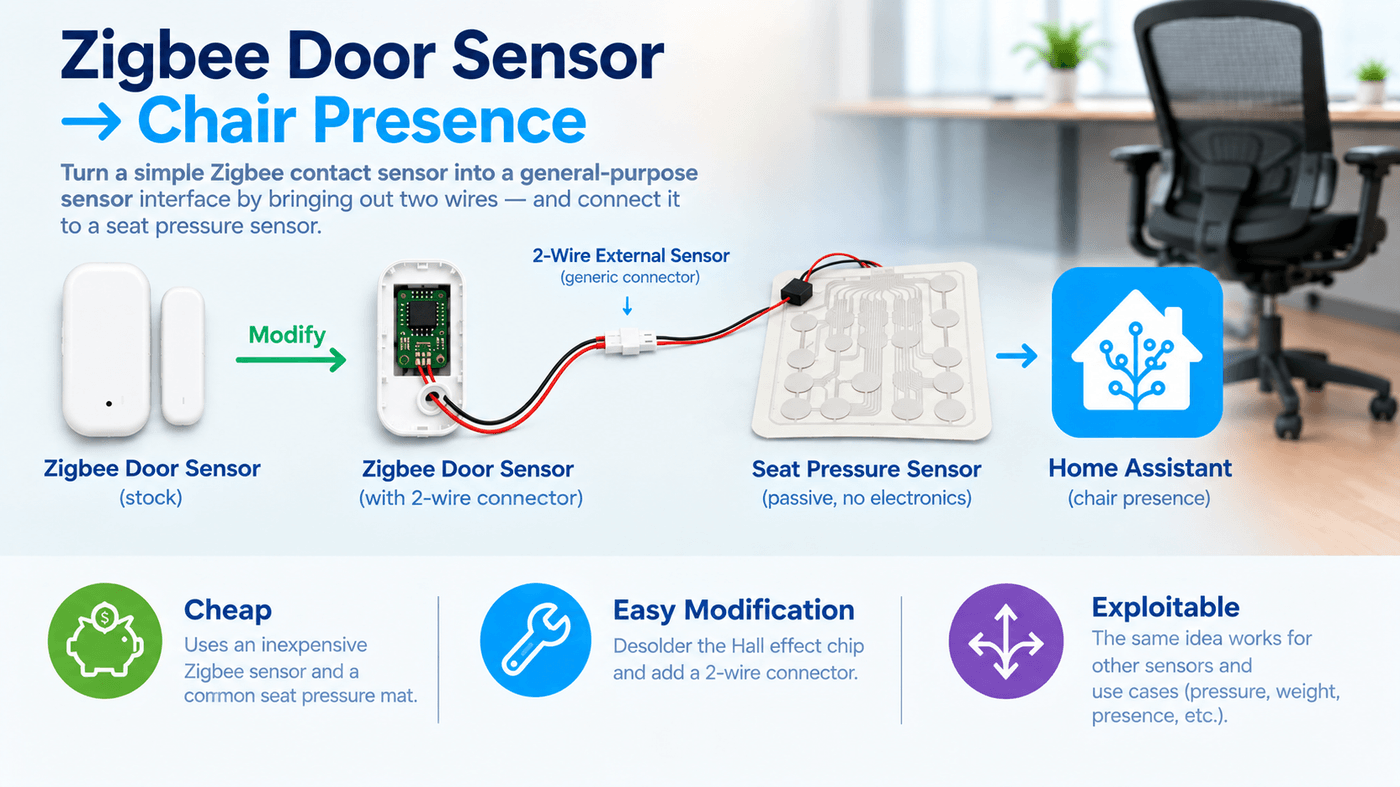
The office PIR is what turns the lights on, and it’s also what turns them off — after a timeout with no motion seen. That works fine for a hallway. It works badly for a desk. Sitting still, reading or typing, doesn’t generate enough motion to keep resetting the timer, so the lights would go dark mid-task, in a room that’s very much occupied. What was missing wasn’t a smarter PIR — it was a second, independent signal: is someone actually in the chair, to hold the lights on regardless of what the ceiling sensor thinks it sees.
That calls for a simple two-state signal — occupied or not, normally open or normally closed — that can be dropped onto whatever the situation actually needs: a seat pressure pad here, a float switch or a pressure mat somewhere else. Not a single-purpose product, a generic contact interface.
Why not just build one
A fully DIY sensor — its own microcontroller, its own radio, its own battery management — would cost more in time, parts, and debugging than the problem is worth, and that’s before touching Zigbee’s pairing and provisioning, which is a project of its own to get right. Meanwhile, Aqara, Tuya, Xiaomi, and similar brands already sell door/window contact sensors as a commodity: bulk-manufactured, cheap, and well proven for battery life of a year or more on a coin cell. Repurposing one of those — reusing the radio, the firmware, and the battery management that already exists — is far less work than building an equivalent from scratch, and it costs less too.
The only piece to solve is getting an external contact into one, since these sensors ship sealed and set up to sense one specific thing: whether a door or window is open.
Reed switch vs. Hall effect: a wiring conflict
Before any of that, there’s an incompatibility to deal with. These sensors aren’t built with a spare two-wire input waiting to be used — they’re no longer built with a reed switch that can easily have a pair of wires soldered in parallel to it. What’s inside now actively resists being wired straight to an external contact, and it has to be identified and dealt with first.
 vs
vs
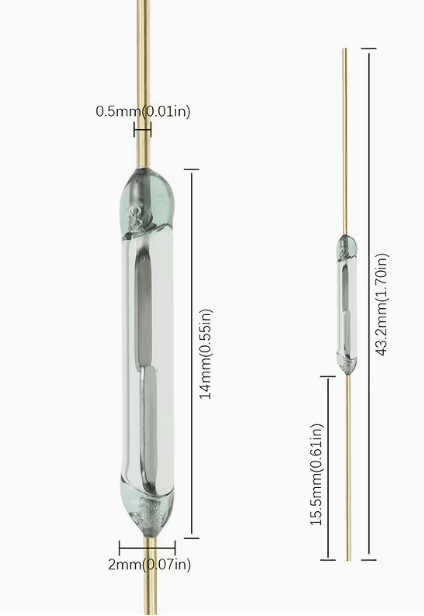
Original door/window sensors sensed the magnet with a tiny glass reed switch (left) — two wires, no electronics, closed or open. That’s about as simple as a sensor gets, and it’s exactly the interface a pressure pad, float switch, or any other dry contact expects. Older sensors could be hacked into a general-purpose contact interface just by soldering a pair of wires directly across the reed switch’s leads.
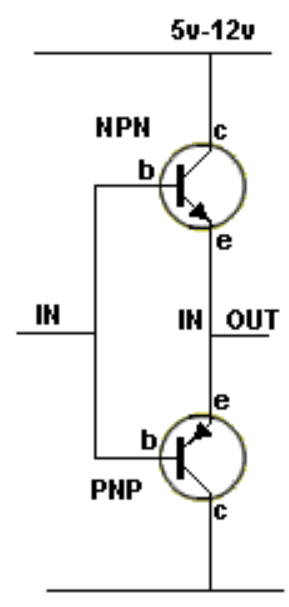
Newer sensors have largely dropped the reed switch for a Hall-effect chip in a SOT-23 package instead — a tiny chip on the PCB rather than a separate glass component to place and wire up during assembly. It’s cheaper to build into a pick-and-place PCB line, and it likely draws less standby current than a mechanical reed switch’s magnetic circuit, which is a reasonable guess at part of why these newer sensors manage a year or two on a battery instead of less. The catch is the output stage: a part like the AH138x family drives its output pin with a totem-pole (push-pull) stage, shown generically on the right above — it actively sources current for a high output and actively sinks it for a low one. The datasheet block diagram for that family shows the same complementary pair driving the output pin directly:
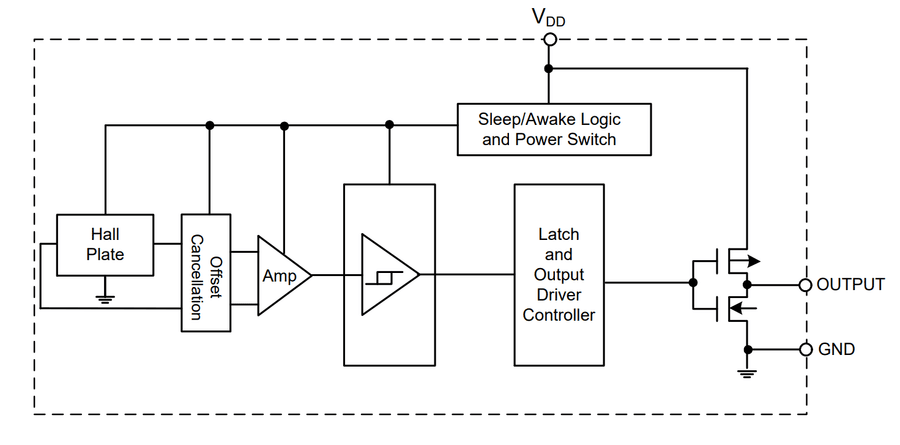
A reed switch, a pressure pad, a float switch — none of them drive anything; they just open or close a path to ground. Wire one of those in parallel with a totem-pole output and the two fight whenever they disagree: the chip actively holding a level while the external contact tries to force the opposite one. That’s a short, not a sensor input. The Hall chip has to come out of the circuit entirely before an external contact can take its place.
The mod
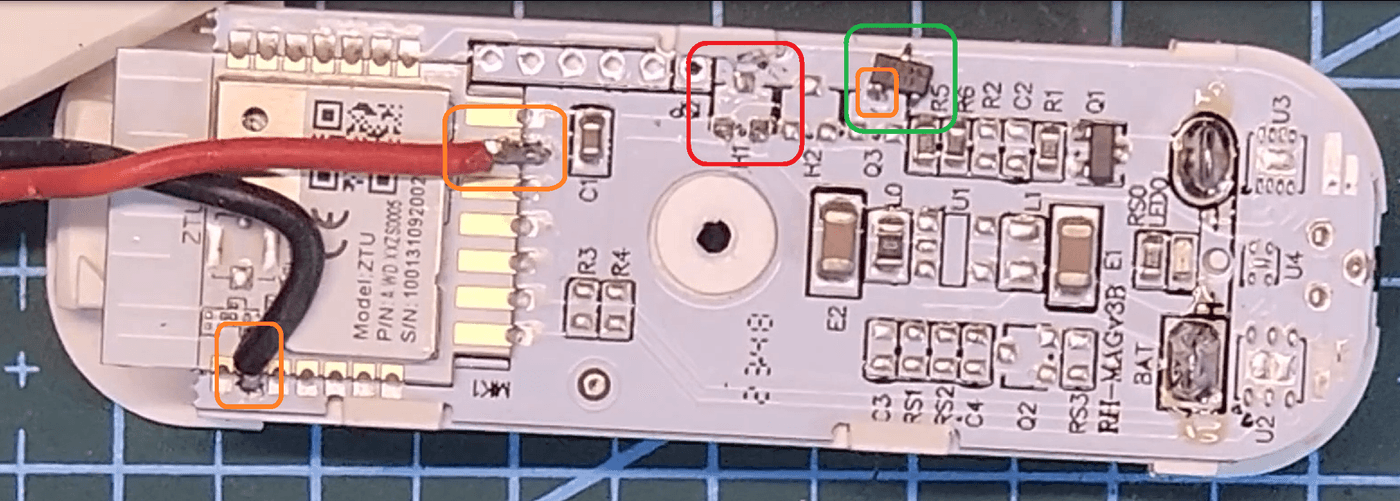
The Hall-effect chip is desoldered outright, from the pads circled in red. Rather than throw it away, it’s tacked back down off to the side of the board (green) — one leg soldered to a nearby unused pad, purely to hold it in place, not wired into anything.
Ground and the CPU’s input aren’t picked up from the chip’s old footprint directly. A multimeter was used to trace those same two nets out to sturdier, better-anchored solder points elsewhere on the board (orange) — a black wire for ground, a red wire for the input — routed out to a small two-pin connector.
No pull-up resistor was added between the red wire and VCC, and the input still reads correctly. That points to the microcontroller’s GPIO using its own internal pull-up rather than needing an external one — worth leaving alone rather than adding a resistor out of habit, since an internal pull-up is typically high-resistance and so draws less current when the contact closes to ground than a lower-value external one would.
From here the MCU can’t tell the difference between “reed switch closed” and “wire jumper closed” — it’s just watching a pin go high or low. Whatever passive contact gets wired to those two leads is the sensor now.
Wired to a chair
For the office, the external contact is a passive seat pressure pad — no electronics of its own, just a matrix of pressure-sensitive traces that closes when weight is on the seat. It has no idea it’s plugged into a repurposed door sensor, and the door sensor’s firmware has no idea it isn’t watching a door. Home Assistant just sees a binary_sensor flip to “on” when the chair is occupied and “off” a few seconds after it’s vacated — reported over Zigbee like any other contact sensor, joined through the same coordinator as the door and window sensors already on the network.
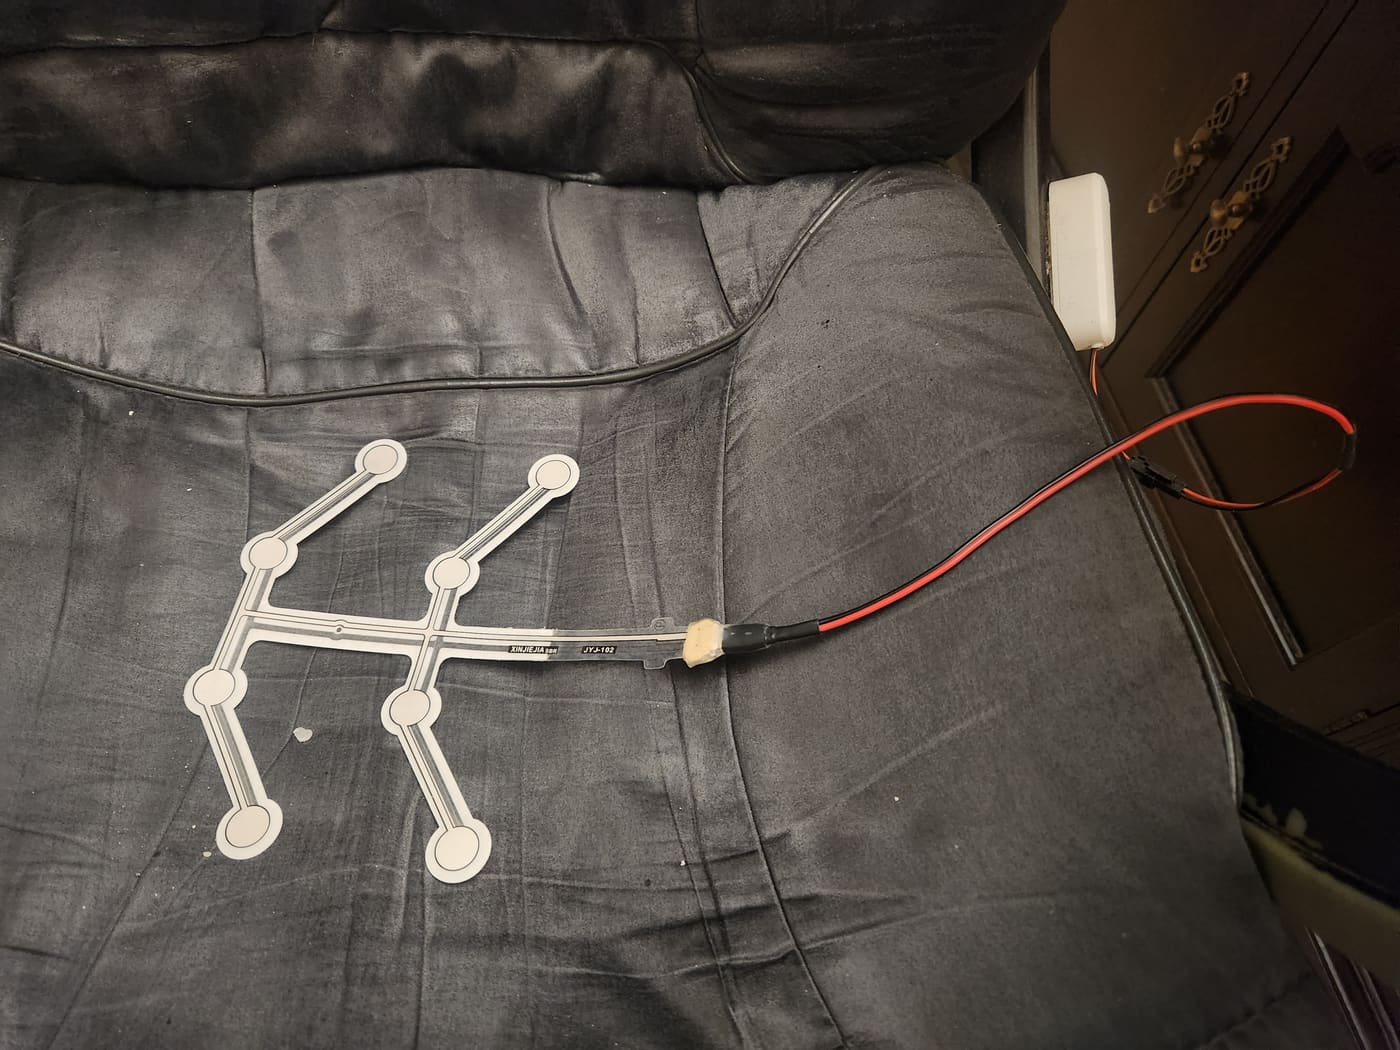
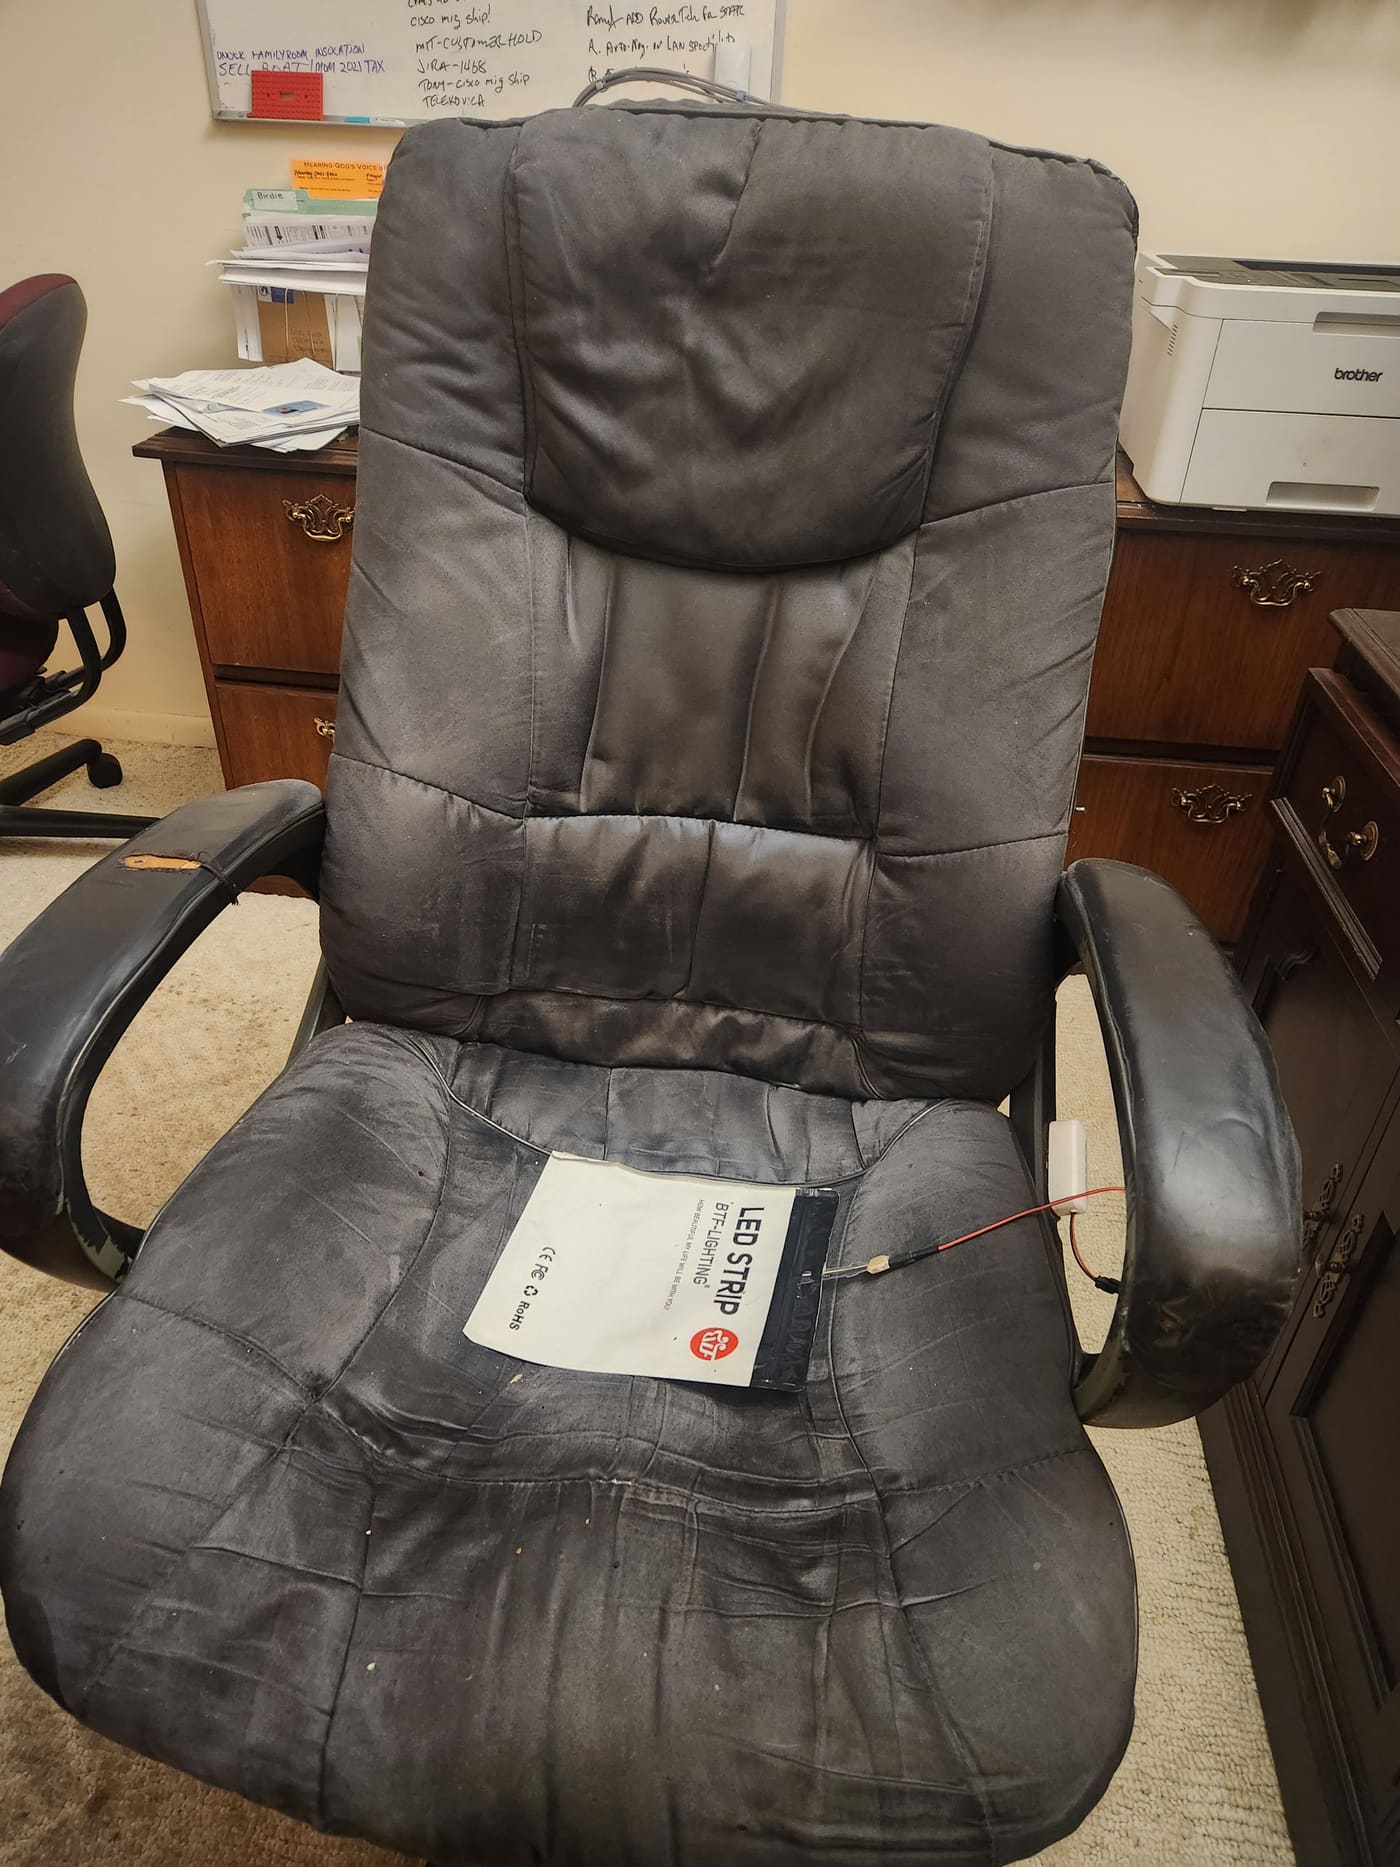
The mat itself is an awkward shape to place — thin, branching, and not something you’d want flexing loose under a cushion indefinitely. Rather than opening up the chair’s upholstery to build it in properly, it’s just tucked inside a left-over stiff plastic bag (an LED strip’s retail packaging, in this case) and set on the seat under the cushion. The bag keeps it from creasing and tearing over time, no sewing or reupholstering required, and it’s worked well since:
The raw entity still carries whatever device_class the Zigbee integration assigned it by default — the same as any other door/window sensor, since as far as the integration can tell, that’s still what it is. A template binary sensor recasts it as occupancy, the correct class for a seat (or room, or desk) being occupied, so it gets the right icon and reads correctly on a dashboard:
template:
  - binary_sensor:
      - name: "Office Chair Occupied"
        device_class: occupancy
        state: "{{ is_state('binary_sensor.office_chair_contact', 'on') }}"
That occupancy state feeds a helper the office lighting automation checks alongside the PIR: motion or seat occupied keeps the lights on, only both going quiet starts the countdown to off. Sitting still no longer matters.
Office Time Tracker
Each occupied and unoccupied log entry, along with the room’s motion sensors, provides enough information to build a journal of accrued hours billable against a project. It starts billing when someone sits down and stops billing when they get up and the lights go out. This has enough of its own moving parts for a write-up someday; here it’s just another consumer of the same occupied/vacant signal. See Inside My Home Assistant Setup for a bit more on how it’s used.
The same trick, twice more
Once the mod exists, it’s not really a chair sensor — it’s a generic, battery-powered, Zigbee-connected N.O./N.C. input, and the same board has been reused for two other jobs around the house:
- A float switch inside a toilet tank, watching for a fill cycle that runs longer than it should — see the Zigbee Toilet Flush Sensor for the full write-up.
- A water level probe in the Christmas tree stand, reporting when the reservoir needs a refill.
Same board, same two bare pads, a different passive contact wired to each — a reed switch, a pressure pad, a float switch, or anything else that just opens and closes a circuit.
Reference
- What Is a Reed Switch, and Modern Applications of Reed Switches — background on reed switch operation and where it’s still used today.